
by Tessa | Homemaking
 Have you ever heard of a Manitoba Maple? A lot of people look at it as a weed because it throws off seedlings like crazy. A wonderful thing about Manitoba maple trees is that they grow in Alberta. The best part: you can tap them!
I would love to make enough syrup every year for my own family. I think it would be a fun experience for us, plus I have a feeling it would be absolutely delicious. However, I have done a bit of research and Manitoba maples take about 25-50 years before they are large enough to tap. Even when they are large enough to tap, you need to harvest 40 liters of sap to make 1 liter of syrup. They should be at least 8 inches in diameter and the average (which is usually larger that 8 inches diameter) will yeild about 56 liters. So that means one tree will yield just over 1 liter of syrup.

I have recently discovered I have about 4 of these trees growing in my front yard. This is my family’s 5th summer here and I have just discovered what kind of trees they are. I wish I had discovered this sooner. Perhaps in February or so. That would allow us time to prepare to tap them.
Now we are moving.
I have found some of those seedlings and I plan to take them. Did you know that fall is a good time of year to transplant trees? I do believe that will work. And then I’ll wait for 25 years until they grow big enough to tap. Do I need the syrup? Obviously not. It will be a labour or love. Because in addition to providing delicious syrup, Manitoba Maple trees are deliciously beautiful!
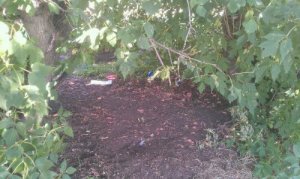
My boys have dubbed this hollow between the trees, “The Cave”
by Tessa | Homemaking
 If this is the first time you’ve have heard about the news I’m about to share, I apologize. I wish I could tell everyone personally instead of having them find out in such an impersonal manner. But I can’t and the deadline is coming closer. So here’s my big news:
We are moving.
We are moving about 3.5 hours away but we have family, friends, and other ties to our current area so we will be back on a pretty regular basis. We bought a farm and are doing some barn renovations down there so things have been pretty hectic lately. Lots of trips down there to arrange renos and prepare the farm for animals and much more needs to be done. So there is a lot of work to be done and I’ve been doing what I can to prepare my family.
This includes things like figuring out internet, grocery stores, mail, banking, church information, kids activitiesc and mommy groups. I’ve also been trying to visualize how we will live in the new place. The house we are going to live in down there has about 200 square feet less space than here. Not a big deal for bedrooms but the main floor of the house is something else. It’s proving to be a tough layout to work with. For example, the “coat closet” is inside the bathroom and the space for the fridge is in the laundry room. I think that we have figured out how we can make our belongings work and I know that God will provide the peace and patience we need to live in that house for the time being. Due to the down sizing, we have had to make some tough decisions. We won’t have the space or storage that we do in our current house (there are only 3 closets in the whole house) so we are getting rid of stuff.
It is amazing how much stuff a person can accumulate. I filled a garbage bag with toys to donate and I packed some of the less popular toys. The boys haven’t missed them. They are actually sitting in a clear plastic bin on a shelf in the playroom and neither boy has asked for them to play with in the whole 6 weeks they have been packed. I may have to donate them as well. I have noticed that since I packed up a good number of toys (the boys play outside most of the time anyway) that I don’t have nearly as many issues getting them to clean up. I’m not tripping on toys the way I used to either. I like that!
I have also taken this opportunity to simplify other areas of our life. I packed about half of our dinnerware. I do still have extra plastic plates/bowls for snack times but we mostly haven’t missed the extra dinnerware. I have been doing way less dishes. I have a dishwasher but I used to wash all the plastics and pots and larger items by hand because the dishwasher was always full with plates. Now I can fit nearly every dirty dish and pot into the dishwasher and just run it every other day. It takes me 20 minutes to do dishes and clean the kitchen in the morning instead of 1.5 hours. The only issue I’ve run into with this is that my husband was upset that both large coffee mugs were dirty and he didn’t want to use a medium one so he didn’t drink his coffee one day.
Things I have already packed/donated: DVDs (we watch Netflix once in a while but that’s about it), books (just kept a couple out that I will read before the move), baby gear (lent it to my sister actually), all of the kids’ clothes that they don’t currently wear (plus most of what actually fits them too – less laundry!) and a lot of my clothes (sad yet freeing to donate all my nice business clothes I used before I became a SAHM, they can bless someone else).
Next areas to simplify/pack: towels (probably leave 1 towel per son, 1 for me, and 2 for hubby), computer gear (we have extras of nearly everything), some fabric (I have to face the fact that I won’t have time to sew it all before the move).
So preparing to move has given me a great opportunity to live with less. It has shown me that we really do have an abundance of “stuff” that we don’t really need. I’m not at the point that I could get rid of it all but I certainly am looking at things differently. I still have a bin with clothes that fit my boys because I know that they (especially my 4 year old) will wear out a couple pairs of pants before they outgrow them. I can just go to the bin to grab a “new” pair. I know that we will eventually have company over for dinner and will require those extra plates. So I’ll just go to the box to grab them. But the won’t go into my regular rotation because I don’t want to be a slave to my stuff. I don’t enjoy dishes or laundry so I’m going to keep it to a minimum.
Less stuff really does translate into more time!
Is there an area in your life and household that you can simplify? Ask yourself, do you really need that stuff or can you do with less?
by Tessa | Homemaking
I am not a conspiracy theorist. I do not believe our government is purposely trying to poison us or that our schools are trying to brainwash our children or that our doctors are purposely trying to make us sick (though I do believe some decisions they make have that side effect but that’s a whole different story!). I do wonder about dentists sometimes though.
While I was growing up I was meticulous about my teeth. I brushed at least twice a day and flossed a few times a week. I thought all my hard work was paying off when my siblings and I went to the dentist and only my sister had cavities. I figured it was because she ate too many candies. Because candies cause cavities, right? My brother didn’t have any in spite of the fact that he was not as meticulous about his dental hygiene as I was. I figured he just got lucky (he figured it was because he chewed a lot of gum).
A few years later, with no change in my dental routine, I came home from the dentist with about 3-4 new fillings. So much for my perfect dental routine! I have since learned that cavities are caused by bacteria, not sugar. Bad bacteria plants itself on your teeth and feeds off sugar to multiply so leaving sugar (natural or artificial) on your teeth certainly isn’t a good thing, but sugar in itself doesn’t cause cavities. With my dental routine I had been fighting the sugar, not the bacteria.
Interesting fact: we are not born with this bacteria. It is given to us through someone else’s spit, usually before our second birthday. Usually by our mother. Not on purpose but through loving actions such as sharing utensils or food or spit cleaning a pacifier. (I can’t remember where I read that but I believe it was in one of Dr. Sear’s books)
So, back to the dentists. I have a theory:
- Toothpaste is supposed to help prevent cavities.
- Dentists promote certain brands of toothpaste.
- Dentists make more money when people have cavities than when their teeth are healthy.
- It would make no logical sense for a dentist to promote something that would put him/her out of business.
- Therefore those toothpastes probably don’t do what the advertisements and packaging claims. In fact, they may be part of the problem.
Is it a conspiracy? Maybe not. But it certainly seems like a conflict of interests.
I have eliminated chemicals in a lot of areas of my life so it would make sense that the toothpaste had to go. I haven’t brushed with toothpaste in almost a year. My cavities haven’t magically healed themselves (darn!) but they haven’t gotten any worse either. The good news: my teeth feel great! They seem to stay clean longer and my breath is still fresh. I also don’t have to coax my son to spit out his yummy bubblegum or fruit burst flavoured toothpaste because it is too dangerous to swallow.

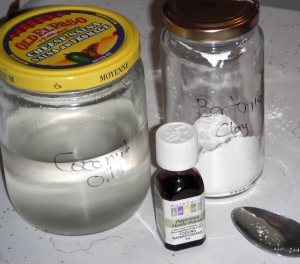
Here’s what I use:
- Coconut Oil: antifungal, antibacterial, and helps stop tooth decay
- Peppermint Essential Oil: antiseptic and minty fresh
- Bentonite Clay
 (a recent addition and not neccesary): mild abrasive, detoxing agent, and has been said to help remineralize teeth
I have found many different recipes online but a lot of them are way to complicated for me. I know people use plain baking soda but, to be perfectly honest, it tastes really gross. It’s also quite abrasive and it is not usually recommended for daily use so I certainly don’t want to use it for my little men.
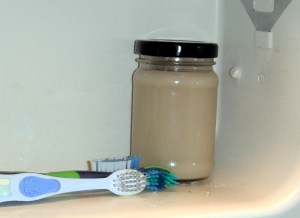
So I have just been using coconut oil with peppermint essential oil. Simple. I like simple. If this is all you have then it will work perfectly fine. Just mix together and dip your toothbrush in to brush. The hardest part is realizing that it is still cleaning, even if it’s not foaming. I also found that I didn’t have to rinse after brushing (helpful when you have little people that want to splash as soon as you turn on the tap!) so you can brush without water.
My recent addition of the Bentonite Clay is because I’m going to try my hand at remineralizing my teeth. I’m taking cell salts (Calc Fluor and Calc Phos
 ), in addition to brushing with clay and coconut oil, and I’m hoping it helps. I brushed with it for the first time today and I can’t even explain how good my teeth feel right now. More than just clean. They feel soft actually. The toothpaste felt strange while brushing but I think it is just a new texture to get used too.
So there is a very simple toothpaste recipe that is safe and gentle enough for a child! C will be very happy to brush his teeth tonight because he was looking forward to being done our baking soda mix too.
Linked up at: Frugally Sustainable
Edit: People have been asking me about the quantities of each: I use about two parts oil to 1 part clay. Then essential oil to taste (my jar took about 10 drops). But you can experiment and mix it until it is a consistency that you like.
Also, for the first photo my house was too hot for my coconut oil to be solid. By the time I had mixed it up and moved it to my bathroom the cool night air solidified it again. But because the clay was mixed it I still find that, even at solid state, it is the perfect consistency to use.
Hope that clears some things up!
Make sure you don’t miss any posts by subscribing to my weekly blog newsletter!
[mc4wp-form]
by Tessa | Homemaking
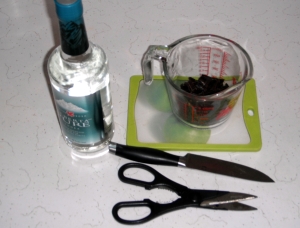
I would venture to say that the majority of people who know me know about my love-affair wtih vanilla. Whether it is in food, or body care products, or candles, I just can’t help myself. It is delicious and beautiful all at the same time! I used to wear vanilla perfume every day and apparently it was seen as “my” scent. Other people would wear it and people who knew me would tell them they smelled like me. My sister’s friend even found a bottle of vanilla perfume while they were in the drugstore and told me sister, “it’s Tessa in a bottle!” So it would make sense that, after seeing all the wonderful vanilla recipes floating around on Pinterest, that I felt compelled to try one.
So today my biggest boy and I made some vanilla extract.
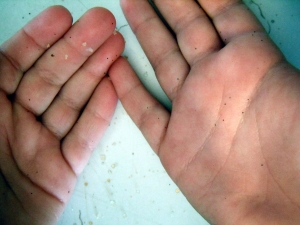
Helping Hands
The ingredients were very simple:
- Vanilla beans (I purchased mind from Real Raw Food in BC, Alberta). I have had the beans for a few months and have been waiting for jsut the right recipe to use them in. They are very precious to me so I didn’t want to waste any.
- Vodka (recipes called for 35%-40% alcohol, I got 40%). I had the pleasure of supporting a local business for this purchase. Chateau Wine and Spirits in Lacombe, Alberta, is a fabulous place to deal with. They offer everything from cheap to specialty beers and wines and vodka and every other kind of alcoholic beverage that tickels your fancy. As I never (read: only once in my entire life other than this time) purchase alcohol, the customer service was great to a newbie like myself. I bought almost the cheapest kind of vodka. (The only reason I didn’t get the cheapest is because I decided to spend the extra couple of bucks to get a glass bottle. Plus it is Alberta-made so I can support local two-fold.) They also do regular wine tasting evenings, bulk orders for weddings or other catered events and can order in special requests! I should also mention that Chateau Wine and Spirits is owned and operated by my sister-in-law and her husband.
So here are my directions:
1. Use about 6-8 beans per cup of vodka. Some recipes called for whole beans, some for split beans, and some for chopped. The most in depth recipe I read called for splitting the beans, scraping out the seeds and then chopping the pods. I figured I’d go halfway and split the bean and then chopp into about half to 3/4 inch lengths. Tip I found while reading comments of the aforementioned recipe: use scissors. It only took me a few minutes to cut my little bundle of beans.
2. Put them in the vodka. (Kids can be a great help if you have a lot of pieces and a very small bottle opening to put them into) Be careful not to overflow your bottle. I poured a bit out of the bottle and put into a glass jar so I have two containers of extract in my cupboard. If you bought a plastic bottle of vodka then use a glass jar or bottle to make it in because you don’t want plastic yuckies leaching into your vanilla over the next months.
3. Shake it up and let it sit. Shake it up every day or so for a week. Then just give it a shake whenever you remember it. Another tip: label your jar/bottle. I used a black Sharpie to write the date on it so it is easy to see how old it is.
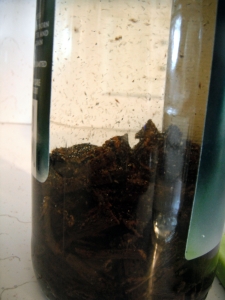
Homemade vanilla extract with seeds floating around
You can use it as early as 2-3 weeks but it is best if you let it sit for about 6 (or more) months. I know that I can’t wait that long though so I’m going to try it in a few weeks. In the meantime, I’m going to use up the vanilla that my sister brought back from her Mexico vacation. And then I’ll use my Costco stuff up. And then, finally, I’ll be able to dive into my homemade vanilla extract! Coffee creamer, cake, muffins… I can smell them already! Actually, I can still smell the vanilla on my hands. Have I mentioned how much I love vanilla?
Make sure you don’t miss any posts by subscribing to my weekly blog newsletter!
[mc4wp-form]
by Tessa | Homemaking
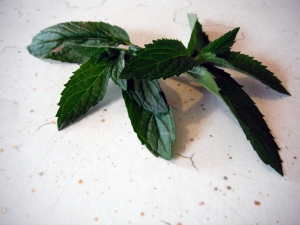
My mint plant started to look like it was feeling a bit crowded so I trimmed a few sprigs off the top with a plan to dry it and put it into one of my new (to me) glass canning jars. I was already picturing it in my pantry as I gently washed and dried my mint. Caleb had different ideas.
“Mom, we need to bake something with these.”
“Like what? I don’t think that the chicken thawing for supper will taste good with mint.”
“No, we should bake cookies. It has been a while since we baked cookies and mint cookies would be so yummy.”
So I went off to my trusty laptop to find a recipe for mint cookies. Chocolate and mint just go hand in hand so we found a great recipe for mint chocolate chip cookies. There were a ton for mint extract but that was the only one I found to use with fresh mint.
We started mixing the ingredients and I soon realized that I didn’t have an egg. So I called the neighbour (aka my mom) to ask if she had one (she pretty much always does!). I sent Caleb over and he walked back very carefully cradling our missing ingredient.
Mint chopped, dough mixed, beater licked and we waited. My kitchen started to smell better and better!
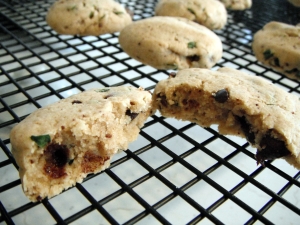
Mint Chocolate Chip Cookies
Fresh out of the oven and garden!
The cookies have now passed the official taste test and it’s all I can do not to eat them all right now. I’ve already had two of them. Or maybe it was three?
I made a few subsititions to the recipe because I try to make cookies a little more healthy for my family: I used about 2/3 of the sugar (looking back I should have also substituted the my organic raw sugar for the white refined stuff); I used organic whole wheat pastry flour; I only put in half the chocolate and part of that was raw cacao nibs. So now I feel a little bit better about the fact that I’ve eaten a few extra cookies.
Things Caleb learned: measuring/counting ingredients, we talked about why we chop the mint (more surface area to infuse the mint flavour), and we counted the total number of cookies made (2 dozen, though it would have been one more except I ate the extra dough!). He also learned about how to harvest mint and the purpose of pruning. We talked about how we are going to dry it to save it for another day. Lastly, we ate some of the fruits of our labour.
Make sure you don’t miss any posts by subscribing to my weekly blog newsletter!
[mc4wp-form]

 Have you ever heard of a Manitoba Maple? A lot of people look at it as a weed because it throws off seedlings like crazy. A wonderful thing about Manitoba maple trees is that they grow in Alberta. The best part: you can tap them!


