
by Tessa | Homemaking
 Have you ever heard of a Manitoba Maple? A lot of people look at it as a weed because it throws off seedlings like crazy. A wonderful thing about Manitoba maple trees is that they grow in Alberta. The best part: you can tap them!
I would love to make enough syrup every year for my own family. I think it would be a fun experience for us, plus I have a feeling it would be absolutely delicious. However, I have done a bit of research and Manitoba maples take about 25-50 years before they are large enough to tap. Even when they are large enough to tap, you need to harvest 40 liters of sap to make 1 liter of syrup. They should be at least 8 inches in diameter and the average (which is usually larger that 8 inches diameter) will yeild about 56 liters. So that means one tree will yield just over 1 liter of syrup.

I have recently discovered I have about 4 of these trees growing in my front yard. This is my family’s 5th summer here and I have just discovered what kind of trees they are. I wish I had discovered this sooner. Perhaps in February or so. That would allow us time to prepare to tap them.
Now we are moving.
I have found some of those seedlings and I plan to take them. Did you know that fall is a good time of year to transplant trees? I do believe that will work. And then I’ll wait for 25 years until they grow big enough to tap. Do I need the syrup? Obviously not. It will be a labour or love. Because in addition to providing delicious syrup, Manitoba Maple trees are deliciously beautiful!

My boys have dubbed this hollow between the trees, “The Cave”
by Tessa | Homemaking

I would venture to say that the majority of people who know me know about my love-affair wtih vanilla. Whether it is in food, or body care products, or candles, I just can’t help myself. It is delicious and beautiful all at the same time! I used to wear vanilla perfume every day and apparently it was seen as “my” scent. Other people would wear it and people who knew me would tell them they smelled like me. My sister’s friend even found a bottle of vanilla perfume while they were in the drugstore and told me sister, “it’s Tessa in a bottle!” So it would make sense that, after seeing all the wonderful vanilla recipes floating around on Pinterest, that I felt compelled to try one.
So today my biggest boy and I made some vanilla extract.

Helping Hands
The ingredients were very simple:
- Vanilla beans (I purchased mind from Real Raw Food in BC, Alberta). I have had the beans for a few months and have been waiting for jsut the right recipe to use them in. They are very precious to me so I didn’t want to waste any.
- Vodka (recipes called for 35%-40% alcohol, I got 40%). I had the pleasure of supporting a local business for this purchase. Chateau Wine and Spirits in Lacombe, Alberta, is a fabulous place to deal with. They offer everything from cheap to specialty beers and wines and vodka and every other kind of alcoholic beverage that tickels your fancy. As I never (read: only once in my entire life other than this time) purchase alcohol, the customer service was great to a newbie like myself. I bought almost the cheapest kind of vodka. (The only reason I didn’t get the cheapest is because I decided to spend the extra couple of bucks to get a glass bottle. Plus it is Alberta-made so I can support local two-fold.) They also do regular wine tasting evenings, bulk orders for weddings or other catered events and can order in special requests! I should also mention that Chateau Wine and Spirits is owned and operated by my sister-in-law and her husband.
So here are my directions:
1. Use about 6-8 beans per cup of vodka. Some recipes called for whole beans, some for split beans, and some for chopped. The most in depth recipe I read called for splitting the beans, scraping out the seeds and then chopping the pods. I figured I’d go halfway and split the bean and then chopp into about half to 3/4 inch lengths. Tip I found while reading comments of the aforementioned recipe: use scissors. It only took me a few minutes to cut my little bundle of beans.
2. Put them in the vodka. (Kids can be a great help if you have a lot of pieces and a very small bottle opening to put them into) Be careful not to overflow your bottle. I poured a bit out of the bottle and put into a glass jar so I have two containers of extract in my cupboard. If you bought a plastic bottle of vodka then use a glass jar or bottle to make it in because you don’t want plastic yuckies leaching into your vanilla over the next months.
3. Shake it up and let it sit. Shake it up every day or so for a week. Then just give it a shake whenever you remember it. Another tip: label your jar/bottle. I used a black Sharpie to write the date on it so it is easy to see how old it is.

Homemade vanilla extract with seeds floating around
You can use it as early as 2-3 weeks but it is best if you let it sit for about 6 (or more) months. I know that I can’t wait that long though so I’m going to try it in a few weeks. In the meantime, I’m going to use up the vanilla that my sister brought back from her Mexico vacation. And then I’ll use my Costco stuff up. And then, finally, I’ll be able to dive into my homemade vanilla extract! Coffee creamer, cake, muffins… I can smell them already! Actually, I can still smell the vanilla on my hands. Have I mentioned how much I love vanilla?
Make sure you don’t miss any posts by subscribing to my weekly blog newsletter!
[mc4wp-form]
by Tessa | Homemaking
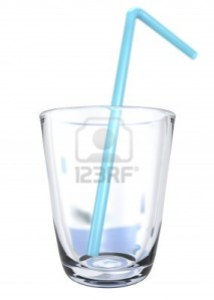
 We are in a bit of a hot streak so many people are trying to figure out how to drink enough water. There are various methods including: put lines on a bottle to mark how much water you should be drinking every hour; fill mason jars every morning and drink them throughout the day, carry a water bottle on your hip everywhere you go, add slices of lemon to it to make it taste yummier, and I’m sure there are plenty more ideas. I’m going to add mine to the mix: stop drinking water!
Here are some quick facts: New studies have shown that there is no specific amount of water that every individual must drink every day. Rather, our daily water requirements vary depending on out health, weight, activity level, and where we live. Signs of a good amount of water intake include not feeling thirsty through the day, adequate amounts of saliva, and light yellow or clear pee.
So now that we know how to make sure we are hydrated enough, let’s stop counting how many glasses of water we drink per day. It was about 30 deg C here today (that’s about 86 F for my American readers). Pretty hot for this part of the world. Tomorrow is supposed to be even hotter. I’m also breastfeeding which means I should technically drink an extra 2-3 cups of water per day.
I had a total of one cup of water.
Eeek! I must be dehydrated, right? Um, no. I also had a cup of coffee, a few cups of milk, a popsicle (okay, maybe I had two!), steamed veggies, and some iced tea. My mouth is watering (possibly because I’m thinking about popsicles), my pee is light yellow (just what you wanted to know about me, right?) and I’m not thirsty. Adam pretty much never drinks water but he is the most hydrated person that I know. He drinks iced tea. Unhealthy amounts of sugar-filled iced tea. (I’ve been trying to convince him to try homemade iced tea but his iced tea is an area he is not willing to compromise).
So stop drinking water. Or at least don’t drink 8 glasses per day of it. Here are some options to try instead:
- Milk (my personal favorite)
- Fruit or veggie juice
- Iced Tea
- Coffee
- Tea
- Fruit (or veggie) smoothies or milk shakes (yummy simple recipe: frozen strawberries, and Costco’s forzen fruit medley clended with cold milk or grape juice. Add a banana for sweetness)
- Fruit and water-filled veggies (watermelon, lettuce, grapes etc)
- Popsicles (fill a mold with OJ for a refreshing treat)
- Yogurt
What is your favorite non-water way to stay hydrated?

 Have you ever heard of a Manitoba Maple? A lot of people look at it as a weed because it throws off seedlings like crazy. A wonderful thing about Manitoba maple trees is that they grow in Alberta. The best part: you can tap them!


